
You will need:
- Clay
- 4 paper cups
- Clove
- 2 cardboard
strips (3″x12″) - Sharp pencil with an
eraser on the other end - Stapler+board pin
- Timer
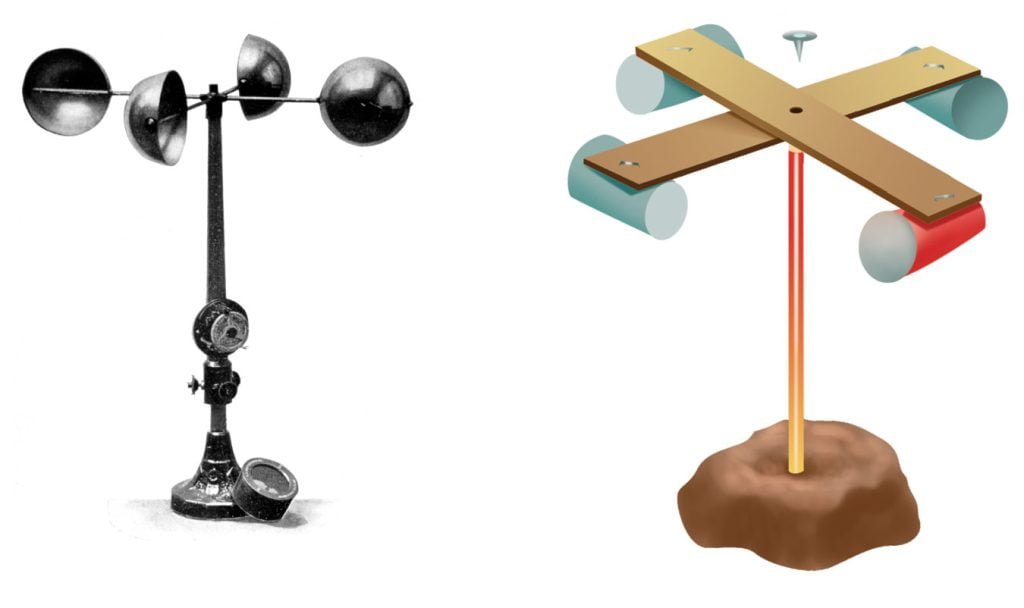
Understand the workings of an anemometer while you create a simple homemade version to measure wind speed.
INSTRUCTIONS
- Firstly, colour only one of the paper cup.
- Take the cardboard strips and place one over the other so that it may resemble a ‘plus’ sign. Staple the strips at the centre.
- Next, take 4 plastic cups and staple the side of each cup to each of the corners of the ‘plus’ sign. Make sure that all the cups are facing one direction only.
- Now push a board pin through the centre of the ‘plus’ sign and push the board pin into the rubber end of the pencil.
- Create a mound of clay sturdy enough to hold the contraption and push the pointed end of the pencil into the clay.
- Take your anemometer outside and place it somewhere where there is plenty of wind.
RESULT
Anemometer helps to measure the speed of wind in your neighbourhood. The wind pushes the cups in a circular motion. Use your timer to count the number of times the coloured cup goes round in circles in one minute. Note down your observations every day at different hours of the day to calculate when the wind picks up speed and when it settles down.