
This activity could be used by a teen taking a high school science class at any level. Motivate your teen by issuing a friendly challenge. Bet he can’t tell whose fingerprints are on the drinking glass, the spoon, or some other household object! By becoming involved in a simulated crime scene you may be able to help your child see how the science lab skills, they are developing in school, have a real-world application. Here’s how to get started:
What You Need:
❑ Pencil
❑ Index card or piece of white paper
❑ Transparent tape or clear packing tape
❑ Talcum powder or cornstarch
❑ Small paint or makeup brush with very soft bristles
❑ Spoon or drinking glass
❑ Cocoa powder
❑ Identiprint (optional)
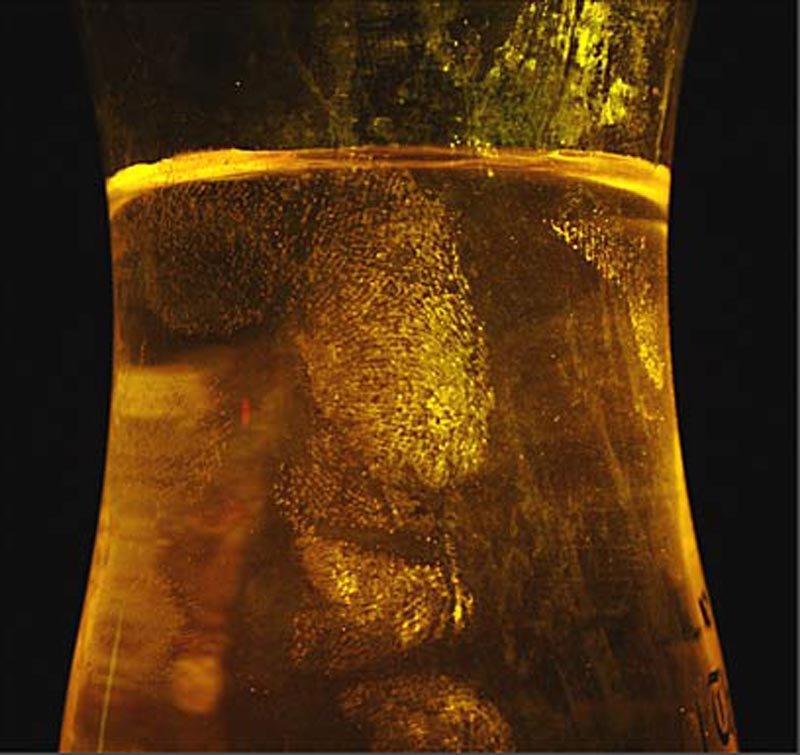
The patterns of ridges on our fingers are unique. No two individuals, even identical twins, have fingerprints that are exactly alike. We leave impressions, or prints, of these patterns on everything we touch. The prints can be visible, as when our fingers are dirty or oily, or they can be “latent,” as when they are made only by the sweat that is always present on our finger ridges. Not even injuries such as burns or scrapes can change the fingerprint structure.
What You Do:
- The easiest and cheapest method to take a fingerprint is to rub pencil lead all over a small area of paper or index card to make an “ink” pad. Press your fingers onto the penciled area; then lift the prints from your fingers with transparent tape and place the tape on a white index cards for reading.
- A “high-tech,” neat, and not too expensive fingerprint method is to use “Identiprint” materials. Identiprint is a commercial system used by retail merchants to put customers’ thumbprints on the backs of their cheques without making an inky mess. Special “ink” pads and self-stick labels take a dark, clear print without leaving any visible residue on the thumb. Ask your local retail merchant to give you a small supply for use with your child.
- A day or two before the activity, place your fingerprints on some common household object such as a drinking glass, table top, or spoon.
- Have your teen look at his fingerprints with the magnifying class and try to identify what type he has. The Federal Bureau of Investigation categorizes prints by three main patterns: arches, loops and whorls. Have your teen use the Internet to find pictures to help him identify the unique characteristics of his fingerprints.
- To dust for fingerprints, sprinkle talcum powder or cornstarch on dark surfaces and cocoa powder on light surfaces where you left visible prints. Have him use the small paint or makeup brush to swipe off the excess powder gently.
- Next place a large piece of transparent tape, or clear packing tape, over the print, carefully peeling off the fingerprint and placing it on an index card or piece of white paper. Challenge him to identify the arches, loops, and whorls within the lifted “latent” fingerprints to see if it’s yours or his!
Extension: Certain chemical fumes react with the perspiration or organic residue left in a fingerprint. Have your teen experiment for themselves. All he will need is a square of aluminium foil folded in fourths, a glass jar, “Superglue,” and a smooth object like an ink pen. They should wipe down the object and then hold it for a minute so that his fingers may leave prints. Set the object inside the jar. Next, put several drops of superglue on the middle of the pie plate and turn the jar upside down over it. The strong chemical fumes from the cyanoacrylate in the glue will react with the residue from his fingers enabling him to see white fingerprint images on the object after about half an hour.